Blog

  • How Neighborhood Food News Connects Women 65+ With Local Makers

    How Neighborhood Food News Connects Women 65+ With Local Makers

    Neighborhood food news is doing more than sharing restaurant openings and farmers market schedules. It is helping women age 65 and older discover local makers, learn about nearby food traditions, and build meaningful connections within their communities.

    For many readers, a short article about a baker, jam maker, gardener, or specialty food producer can lead to a new routine: visiting a weekly market, joining a tasting event, ordering from a small kitchen, or meeting neighbors who share similar interests.

    This kind of local reporting brings food closer to home—both physically and socially.

    What Is Neighborhood Food News?

    Neighborhood food news focuses on the people, places, and activities that shape local food life. It may include:

    – Profiles of small food businesses

    – Farmers market updates

    – Stories about home gardeners

    – Local cooking classes

    – Community meals and food events

    – Seasonal produce guides

    – Interviews with bakers, growers, and artisans

    – Information about new shops and neighborhood services

    Unlike broad food coverage, neighborhood food news is personal and practical. It helps readers answer questions such as:

    – Who makes food nearby?

    – Where can I find fresh, local products?

    – Which markets are easy to visit?

    – What events are happening this week?

    – How can I support a small business in my area?

    For women 65 and older, this information can open the door to new experiences without requiring long travel or complicated planning.

    Why Local Makers Matter

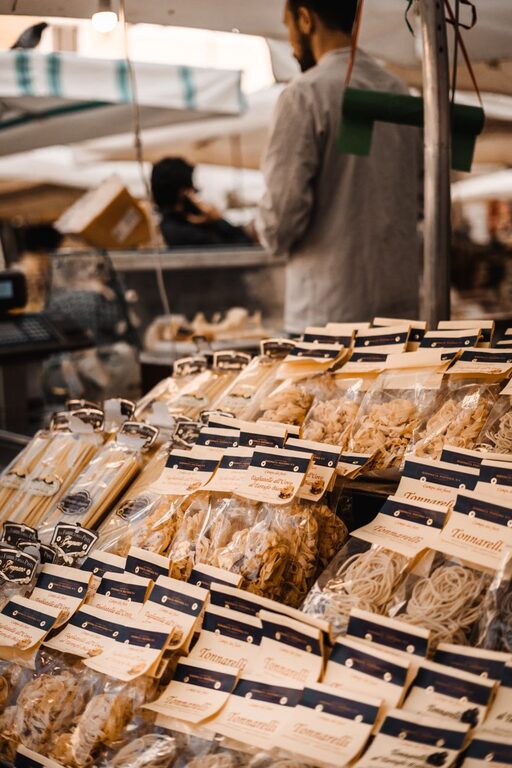
    Local makers bring personality and skill to a community’s food culture. They may create handmade bread, small-batch sauces, fresh pasta, baked goods, preserves, chocolates, spice blends, or prepared meals.

    Buying from these makers can feel more direct than shopping at a large store. Customers often learn how a product is made, where ingredients come from, and what inspired the maker to start.

    This personal connection is one reason local food stories are so appealing. A reader may see a feature about a neighbor who grows herbs, then decide to visit that person’s booth at a market. A story about a family bakery may inspire someone to attend a weekend breakfast event.

    Local makers also give older adults more ways to participate in community life. A visit may include a conversation, a sample, a recipe exchange, or an introduction to another shopper.

    Food News as a Guide to Nearby Experiences

    Neighborhood food reporting can make local activities easier to find. Many small makers do not have large advertising budgets, and some rely on word of mouth. A community newsletter, blog, or social media page can help their work reach more people.

    Useful food news often includes clear details such as:

    – Location and operating hours

    – Market dates

    – Ordering information

    – Parking or public transportation options

    – Whether seating is available

    – Seasonal products

    – Accepted payment methods

    – Accessibility information

    These details help readers plan with confidence. Instead of wondering whether an event will be convenient, they can decide when to go, what to expect, and whether to invite a friend.

    A well-written local article can also introduce smaller events that may not appear in larger publications. A neighborhood garden tour, bread-making demonstration, or community tasting may be just a few miles away.

    Building Connections Through Shared Interests

    Food offers an easy way to start a conversation. People may have different backgrounds, careers, and routines, but many enjoy discussing favorite recipes, family traditions, or new ingredients.

    For women 65 and older, local food activities can provide natural opportunities to meet others. A regular visit to the same market can lead to familiar faces and friendly conversations. A cooking class can create a small group with a shared interest. A maker’s open house can bring together customers who might not otherwise meet.

    These connections do not have to be formal. They may begin with a simple question:

    – Have you tried this bread before?

    – Which vegetables are best this week?

    – Do you know when the market returns?

    – What is your favorite way to use this spice?

    – Have you visited this maker’s shop?

    Over time, these brief exchanges can become lasting friendships or informal support networks.

    The Value of Food Stories for Women 65+

    Neighborhood food news can be especially useful for women who want to stay active, curious, and connected. It offers ideas that fit many lifestyles and interests.

    Some readers may be looking for easy prepared foods. Others may enjoy discovering new ingredients, supporting independent businesses, or finding activities to share with family members. Local food coverage can serve all of these needs without assuming that every reader has the same budget, energy level, or cooking routine.

    Food stories can also highlight the knowledge that older women already bring to their communities. Many have years of experience with gardening, baking, preserving, entertaining, and family recipes. When local reporting invites readers to share their own tips, it turns the audience into part of the story.

    For example, a neighborhood blog might publish a collection of favorite summer recipes from local residents or feature readers’ ideas for using farmers market vegetables. These contributions recognize older women as active participants in local food culture, not simply consumers.

    How Local Makers Can Reach More Older Customers

    Food news is most helpful when makers communicate clearly and welcome a wide range of customers. Small businesses can make their information easier to use by:

    Sharing complete details

    A maker’s listing should include the location, schedule, product information, and best way to place an order. Clear details reduce uncertainty and make visits more comfortable.

    Offering simple ordering options

    Some customers prefer phone orders, printed menus, or in-person purchases. Providing more than one way to connect can help local makers serve people with different preferences.

    Creating comfortable spaces

    Seating, shade, clear signs, and easy-to-navigate displays can make markets and food events more inviting. Friendly service and time for conversation also matter.

    Explaining products

    Short descriptions, recipe ideas, and serving suggestions can help customers feel comfortable trying something new. Makers can also explain how products should be stored or used.

    Welcoming repeat visits

    A regular schedule helps customers form habits. Weekly or monthly events give people a reason to return and make it easier to stay connected.

    Ways Readers Can Use Neighborhood Food News

    Readers can turn local food coverage into simple, enjoyable routines. They might:

    1. Subscribe to a neighborhood newsletter.
    2. Mark market dates on a calendar.
    3. Visit one new local maker each month.
    4. Invite a friend or family member to join.
    5. Save favorite recipes and product ideas.
    6. Share useful articles with neighbors.
    7. Ask makers about upcoming events.
    8. Write a short review or recommendation.

    Even one small outing can lead to a new favorite food and a stronger sense of connection to the neighborhood.

    A Growing Local Food Network

    Neighborhood food news creates a bridge between readers and the people who make, grow, and prepare food nearby. For women 65 and older, that bridge can lead to discovery, conversation, and participation.

    A local article may begin with a simple introduction to a baker or gardener. From there, it can encourage a market visit, a new friendship, or a shared meal. By telling practical and personal stories, neighborhood food coverage helps communities recognize the talent already around them.

    In the end, local food news is not only about what is available to eat. It is about the people behind the food—and the relationships that grow when neighbors take the time to connect.

  • Decorative Cake Making Is Back as a Relaxing Creative Hobby

    Decorative Cake Making Is Back as a Relaxing Creative Hobby

    Decorative cake making is enjoying a fresh wave of interest. Once reserved for special occasions or professional bakeries, detailed cake decorating has become an approachable creative hobby for people of all skill levels.

    With a few basic tools, a simple recipe, and time to practice, anyone can create a cake that feels personal and memorable. The process is not only about the finished design. Mixing, shaping, piping, and arranging decorations can also provide a relaxing break from busy routines.

    Why Decorative Cake Making Is Appealing

    Cake decorating combines several creative activities in one project. It involves color choices, texture, pattern, design, and presentation. Unlike some hobbies, it also produces something useful and enjoyable to share.

    Many people are drawn to decorative baking because it offers:

    – A hands-on activity away from screens

    – A chance to experiment with colors and shapes

    – A satisfying way to mark birthdays and celebrations

    – A creative outlet that can be practiced at home

    – A finished product that can be enjoyed with others

    The hobby is flexible, too. A beginner might start with a frosted sheet cake and a few sprinkles. Someone with more experience may try layered designs, piped flowers, or fondant details. There is no single correct way to decorate a cake.

    The Relaxing Side of Cake Decorating

    Decorative cake making requires attention, but it does not have to feel demanding. Repeating simple actions, such as smoothing frosting or piping small dots, can create a steady rhythm. Focusing on each step may help set aside everyday distractions for a while.

    The process also encourages patience. Cakes often need time to cool before they can be decorated, and frosting may need to be added in several stages. Learning to work at a comfortable pace can make the activity more enjoyable.

    A decorating session can be especially relaxing when it is treated as creative time rather than a test of skill. Small imperfections do not have to be corrected. A slightly uneven line or an unusual color combination can add character to a homemade cake.

    Starting With the Basics

    New decorators do not need a large collection of equipment. A small set of reliable tools is enough to begin exploring the hobby.

    Useful starting supplies include:

    – A cake pan or two

    – A mixing bowl and basic measuring tools

    – An offset spatula for spreading frosting

    – A piping bag

    – One or two piping tips

    – A turntable, if available

    – Food coloring

    – Sprinkles or simple edible decorations

    A turntable can make decorating easier, but it is not essential. A cake can also be rotated carefully on a plate or board.

    It is usually best to begin with a familiar cake recipe. Vanilla, chocolate, and carrot cakes are popular choices because they work well with many types of frosting. Starting with a dependable recipe allows the decorator to focus on design instead of managing too many new techniques at once.

    Simple Techniques for Beginners

    The first decorating techniques can be both practical and attractive. A smooth layer of frosting creates a clean foundation for additional details. Piped borders can hide uneven edges and add a finished look.

    Beginners can also try:

    Swirls and Rosettes

    Using a star-shaped piping tip, decorators can create swirls, rosettes, and simple floral patterns. These designs look detailed but rely on repeated movements, making them easy to practice.

    Two-Tone Frosting

    Two frosting colors can be placed side by side in a piping bag. When piped together, they create a striped or blended effect. This technique adds visual interest without requiring complicated shapes.

    Simple Texture

    A fork, spoon, comb, or small spatula can create texture in frosting. Lines, waves, ridges, and soft peaks can turn a plain cake into an appealing design.

    Sprinkles and Edible Toppings

    Sprinkles, chopped nuts, shredded coconut, and small candies provide quick decoration. They can be arranged in bands, borders, or patterns to make the cake look intentional and colorful.

    Finding Inspiration Without Copying

    Inspiration can come from many places, including gardens, fabric patterns, seasonal colors, and favorite desserts. Looking at cake designs online can help decorators understand how different colors and shapes work together.

    Instead of trying to recreate a complicated design immediately, it can help to identify one feature to practice. For example, a decorator might focus on a color palette, a piped border, or a particular flower shape.

    Keeping a small idea notebook can also be useful. It might include:

    – Color combinations

    – Sketches of future cake designs

    – Notes about frosting techniques

    – Ideas for birthdays and holidays

    – Observations about what worked well

    This approach turns inspiration into a personal collection of ideas rather than a long list of difficult projects.

    Making the Hobby More Enjoyable

    A calm workspace can make a decorating session feel more like a hobby and less like a chore. Gathering ingredients and tools before beginning reduces interruptions. Playing music, listening to a podcast, or working quietly can help create a pleasant atmosphere.

    It is also helpful to plan enough time for the cake to cool and the frosting to set. Rushing often makes decorating more difficult. Even a simple cake can benefit from a relaxed schedule.

    Some people enjoy decorating alone, while others prefer to make it a shared activity. Children, friends, and family members can help with safe, simple tasks such as adding sprinkles or choosing colors.

    Learning From Mistakes

    Cake decorating involves trial and error. Frosting may be too soft, a design may not look as expected, or decorations may shift while being added. These experiences are a normal part of learning.

    Rather than treating mistakes as failures, decorators can use them as information. A piping practice sheet can show whether the frosting has the right consistency. A small test area can reveal how colors will look together. Taking a quick photo of each project can also help track progress over time.

    One of the most rewarding parts of the hobby is seeing improvement. A design that once seemed difficult may become comfortable after a few attempts.

    Choosing Projects That Fit Your Skill Level

    A good project should be challenging enough to hold interest but manageable enough to finish. Starting with an overly complicated cake can make the hobby feel stressful.

    A gradual progression might look like this:

    1. Spread frosting smoothly on a single-layer cake.
    2. Add a simple piped border.
    3. Practice stars, dots, and swirls.
    4. Decorate a two-layer cake.
    5. Experiment with color blending and textured designs.
    6. Try themed decorations for a special event.

    This step-by-step approach builds confidence while leaving plenty of room for creativity.

    The Joy of Sharing the Finished Cake

    Decorative cakes often become part of a shared experience. A homemade cake can make an ordinary gathering feel more special, whether it is prepared for a birthday, a weekend dessert, or a casual get-together.

    Sharing also provides a natural reason to keep practicing. Each cake can be designed for a particular person, season, or occasion. The result does not need to look professional to be meaningful. Personal effort and thoughtful details are often what people remember most.

    A Creative Hobby With Room to Grow

    The return of decorative cake making reflects a broader interest in hands-on, creative activities. It offers an enjoyable balance of structure and freedom: recipes provide a starting point, while colors, textures, and decorations leave room for personal expression.

    Whether someone spends ten minutes adding sprinkles or several hours creating a detailed design, cake decorating can be a rewarding way to slow down and make something by hand. With simple tools, realistic expectations, and a willingness to experiment, this sweet hobby can become a relaxing part of everyday life.

  • Culinary Travel at Home: Global Festival-Inspired Cooking Nights

    Culinary Travel at Home: Global Festival-Inspired Cooking Nights

    Traveling through food is one of the easiest ways to explore the world without leaving home. A cooking evening inspired by a global food festival can bring new flavors, traditions, music, and stories to your kitchen. It can also be as simple or elaborate as you like, from preparing one regional dish to creating a full themed dinner for family and friends.

    The goal is not to recreate a festival perfectly. Instead, use the festival as inspiration for a relaxed evening built around shared food and curiosity. Choose a place, learn a little about its food culture, and create a menu that encourages everyone to participate.

    Why Create a Festival-Inspired Cooking Night?

    Food festivals often celebrate more than recipes. They highlight local ingredients, seasonal customs, music, crafts, and community. Bringing those ideas into your home can make an ordinary dinner feel more memorable.

    A themed cooking evening can help you:

    – Try ingredients you have never used before

    – Learn about food traditions from another region

    – Turn meal preparation into a group activity

    – Create a fun setting for friends or family

    – Discover new recipes without planning a formal party

    – Connect food with travel memories or future destinations

    You do not need special equipment or advanced cooking skills. A simple menu, a welcoming atmosphere, and a willingness to experiment are enough.

    Choose a Festival or Food Tradition

    Start by selecting a festival that interests you. You might choose one connected to a place you have visited, a destination on your travel list, or a seasonal ingredient you enjoy.

    Here are a few ideas:

    A Spanish Tapas Evening

    Create a table filled with small plates, allowing everyone to sample several dishes. Consider patatas bravas, tortilla española, marinated vegetables, olives, crusty bread, and a simple dessert featuring citrus or almonds.

    The appeal of a tapas-inspired evening is its flexibility. Most dishes can be prepared in advance, and guests can help assemble plates or create their own combinations.

    A Japanese Street Food Night

    Focus on approachable dishes such as savory pancakes, rice bowls, noodle dishes, or grilled skewers. Set out toppings and sauces so guests can customize their meals.

    Keep the table uncluttered and serve food in small bowls or individual portions. A few shared side dishes can make the meal feel casual and festive.

    An Indian Spice Market-Inspired Dinner

    Build the menu around fragrant spices, colorful vegetables, rice, flatbreads, and a cooling yogurt-based side. You could prepare a lentil dish, roasted vegetables, chutney, and a simple dessert with cardamom or fruit.

    For a group, prepare one main dish and invite guests to contribute toppings or sides. This approach keeps the cooking manageable while still offering plenty of variety.

    A Mediterranean Harvest Table

    Use fresh vegetables, grains, herbs, beans, cheese, and bread to create a generous shared meal. A Mediterranean-inspired table might include roasted vegetables, a grain salad, stuffed leaves, dips, and fruit.

    This theme works especially well for outdoor dining. Add a pitcher of sparkling water with lemon, herbs, or seasonal fruit for a simple centerpiece.

    Build a Manageable Menu

    A successful cooking evening does not require a long list of dishes. Choose a menu with different textures, colors, and levels of preparation.

    A useful formula is:

    – One main dish

    – One vegetable or salad

    – One starch, bread, or grain

    – One sauce, dip, or condiment

    – One simple dessert

    – One themed drink, with nonalcoholic options

    Try to prepare dishes that can share ingredients. For example, fresh herbs can be used in a salad, sauce, and garnish. Roasted vegetables can work as a side dish and as a filling for flatbread.

    Balance hands-on recipes with make-ahead items. If every dish requires attention at the same time, the evening may become stressful. Prepare sauces, dough, desserts, and chopped ingredients earlier whenever possible.

    Make the Cooking Part of the Experience

    A festival-inspired evening should feel interactive rather than like a regular dinner with extra decorations. Give guests small tasks that match their comfort level.

    Some simple activities include:

    – Washing and chopping vegetables

    – Mixing a dressing or sauce

    – Shaping dumplings or filled pastries

    – Building skewers

    – Arranging a shared platter

    – Making a spice blend

    – Preparing a garnish station

    – Writing labels for unfamiliar ingredients

    If children are joining, offer safe tasks such as tearing herbs, arranging toppings, stirring cold mixtures, or decorating dessert plates.

    You can also create a short “ingredient introduction.” Before cooking, explain where a key ingredient comes from, how it is used, or why it suits the chosen theme. Keep the information brief and conversational.

    Set the Scene Without Overdoing It

    The atmosphere can suggest a destination without turning your home into a themed set. Choose a few details that support the food.

    Consider:

    – A playlist featuring music from the region

    – Cloth napkins or serving pieces in colors inspired by the menu

    – A small map or printed menu

    – Fresh herbs, flowers, or seasonal produce as decoration

    – Shared platters instead of formal individual courses

    – Candles or soft lighting for an evening meal

    Avoid relying on stereotypes or random decorations. A thoughtful menu and a little cultural background are more meaningful than excessive props.

    If your guests are unfamiliar with certain ingredients, label them clearly. You might include a short note describing flavor, texture, or common uses.

    Plan a Simple Evening Schedule

    A loose schedule helps the event flow smoothly.

    Before Guests Arrive

    Complete the tasks that require the most time, such as roasting, simmering, chilling, or preparing dough. Set out ingredients in groups so the cooking area stays organized.

    Welcome and Introduction

    Offer a small snack or drink while you explain the evening’s theme. Share why you chose the festival or food tradition and describe the dishes you will prepare.

    Cook Together

    Begin with the recipe that takes the longest. While it cooks, move on to dishes that can be prepared quickly. Keep conversation moving by asking guests about memorable meals, favorite travel experiences, or ingredients they would like to try.

    Eat and Explore

    Serve the meal family-style when possible. Encourage guests to taste sauces, toppings, and side dishes together. If a flavor is new, describe it positively and give people time to decide what they enjoy.

    Finish with Dessert

    End with something simple, such as fruit, cookies, rice pudding, chilled sweets, or a small pastry. Dessert does not need to match the main course exactly; it only needs to complete the mood.

    Keep the Experience Welcoming

    People have different tastes, dietary needs, and comfort levels with unfamiliar foods. Offer a few flexible choices, such as a mild sauce alongside a spicy one or vegetables that can be served separately.

    Check ingredient labels when using packaged products, and ask guests about allergies or restrictions before planning the menu. Keep shared utensils separate where needed, and explain the ingredients in each dish.

    Most importantly, treat the evening as an invitation to explore, not a test of authenticity. Recipes change across families, regions, and generations. Your home version can be inspired by a tradition while still reflecting your own kitchen.

    Continue the Journey

    After dinner, write down the dishes everyone enjoyed and the ingredients worth using again. Save a few recipes in a shared digital folder or create a small travel-inspired cookbook with notes and photos.

    You can also turn the idea into a series. Host a different cooking evening each month, moving from one region or festival tradition to another. Over time, your kitchen can become a place for discovering new flavors, sharing stories, and enjoying the world one meal at a time.

  • Heirloom Beans: Fresh Ideas for Everyday Meals

    Heirloom Beans: Fresh Ideas for Everyday Meals

    Why Cook with Heirloom Beans?

    Heirloom beans bring color, texture, and character to everyday meals. Unlike many mass-produced varieties, heirloom beans are often grown from seed lines that have been passed down through generations. They come in a wide range of shapes and colors, from creamy white beans to speckled, striped, red, black, and purple varieties.

    Each type can have a slightly different texture and flavor. Some become silky and soft when cooked, while others hold their shape well. This variety makes heirloom beans useful far beyond traditional soups and stews.

    They are also a practical pantry ingredient. Dried beans can be stored for a long time, and cooked beans can be added to quick meals throughout the week. With a few simple techniques, you can use them in breakfast dishes, lunches, dinners, snacks, and even baked recipes.

    Start with the Basics

    Choose the Right Bean

    The best heirloom bean depends on how you plan to use it:

    • Creamy beans: Great for mashing, blending, and making smooth soups or spreads.
    • Firm beans: Ideal for salads, grain bowls, and dishes where the beans need to hold their shape.
    • Small beans: Useful in quick-cooking soups, side dishes, and fillings.
    • Large beans: Satisfying in casseroles, braises, and hearty main dishes.

    If you are trying a variety for the first time, cook a small batch and taste it on its own. This helps you notice its flavor and texture before adding strong seasonings.

    Cook a Batch for the Week

    Before cooking, sort through dried beans and remove any small stones or damaged beans. Rinse them well, then soak them if desired. An overnight soak can help shorten the cooking time, while a quick soak involves boiling the beans briefly and letting them rest in the hot water.

    Drain and rinse the soaked beans, then simmer them in fresh water until tender. Cooking time varies depending on the bean’s age, size, and variety. Keep the beans covered with water as they cook, and add salt according to your preferred method.

    Once cooked, store the beans in the refrigerator for several days or freeze them in small portions. Freezing them in one- or two-cup amounts makes it easy to add them to meals without preparing a full batch each time.

    Build Simple Everyday Meals

    1. Add Beans to Breakfast

    Heirloom beans can make breakfast more filling and flavorful. Warm them in a skillet with olive oil, garlic, and a pinch of smoked paprika. Serve them beside eggs, toast, or roasted vegetables.

    You can also mash cooked beans with a fork and spread them on toast. Add sliced tomatoes, sautéed greens, fresh herbs, or a sprinkle of cheese. For a softer texture, blend the beans with a little olive oil and lemon juice before spreading.

    Another option is a breakfast hash. Combine beans with diced potatoes, onions, and peppers, then cook everything in a skillet until browned. Top with an egg or serve with avocado for a colorful morning meal.

    2. Refresh Your Salads

    Heirloom beans are an easy way to turn a simple salad into a complete meal. Their firm texture works especially well with crisp vegetables and bright dressings.

    Try combining cooked beans with:

    • Chopped cucumber and tomatoes
    • Roasted peppers and red onion
    • Shredded carrots and cabbage
    • Fresh parsley, basil, or cilantro
    • Cooked grains such as farro, rice, or quinoa

    For a basic dressing, whisk together olive oil, lemon juice or vinegar, mustard, salt, and pepper. Let the salad rest for 10 to 15 minutes before serving so the flavors can blend.

    You can also serve warm beans over greens. Toss them with a simple vinaigrette while they are still slightly warm, then spoon them over spinach, kale, or mixed lettuce.

    3. Make Better Grain Bowls

    Grain bowls are a flexible way to use leftovers. Start with rice, barley, couscous, or another grain. Add heirloom beans, roasted vegetables, and a sauce or dressing.

    A few combinations to try include:

    • White beans, roasted squash, kale, and a lemon herb dressing
    • Red beans, brown rice, corn, and tomato salsa
    • Speckled beans, farro, roasted carrots, and yogurt sauce
    • Black beans, rice, cabbage, and a lime-based dressing

    For extra texture, add toasted seeds, chopped nuts, crisp onions, or breadcrumbs. The contrast between soft beans and crunchy toppings makes a simple bowl more interesting.

    Use Beans in Spreads, Dips, and Sauces

    Smooth heirloom beans can replace chickpeas in a spread or dip. Blend cooked beans with olive oil, lemon juice, garlic, and herbs. Add water a teaspoon at a time until the mixture reaches the desired consistency.

    For a warm dip, stir beans together with sautéed onions, roasted peppers, and grated cheese. Bake until hot and lightly browned. Serve with toasted bread, crackers, or sliced vegetables.

    Beans can also thicken sauces. Blend a small portion into tomato sauce, vegetable soup, or a pan sauce. This adds body without changing the main flavor of the dish. Whole beans can be folded into pasta sauce along with spinach, mushrooms, or roasted vegetables.

    Turn Beans into Main Dishes

    Hearty Bean Skillet

    Sauté onions, garlic, and seasonal vegetables in a large skillet. Add cooked beans, canned tomatoes, and herbs. Simmer until the vegetables are tender and the sauce has thickened. Serve it with crusty bread, rice, or a baked potato.

    This method works with almost any heirloom bean. You can change the seasoning to suit the meal, using Italian herbs, curry spices, chili powder, or a simple combination of black pepper and fresh herbs.

    Bean Patties and Fritters

    Mash cooked beans with breadcrumbs, a beaten egg or another binder, chopped onion, and seasonings. Shape the mixture into small patties and cook them in a lightly oiled skillet until crisp on both sides.

    Serve the patties in a bun, over salad, or with roasted vegetables. Smaller versions make a useful appetizer or snack. If the mixture feels too wet, add more breadcrumbs. If it feels dry, stir in a spoonful of olive oil or a little cooking liquid.

    Make Soups and Stews More Interesting

    Heirloom beans are natural additions to soups, but you do not have to rely on one standard recipe. Combine them with different vegetables, grains, and seasonings to create new variations.

    Try these ideas:

    • Beans, tomatoes, pasta, and Italian herbs
    • Beans, potatoes, leeks, and rosemary
    • Beans, corn, peppers, and smoky spices
    • Beans, cabbage, carrots, and barley

    For a creamy soup without blending the entire pot, puree one or two cups of beans with broth and stir the mixture back in. You will get a thicker texture while keeping some whole beans and vegetables intact.

    Helpful Tips for Better Results

    • Season thoughtfully: Beans take on the flavors around them, so taste as you go and adjust the salt near the end of cooking.
    • Keep textures in mind: Use firm beans for salads and softer beans for spreads or soups.
    • Save the cooking liquid: It can add flavor and body to soups, sauces, and stews.
    • Do not overcrowd the pan: When crisping cooked beans or patties, leave space between pieces so they brown properly.
    • Label frozen portions: Write the bean variety and date on each container for easy meal planning.
    • Mix varieties carefully: Beans of different sizes may cook at different rates, so cook them separately unless you know their timing is similar.

    A Bean for Every Meal

    Heirloom beans are more than a soup ingredient. Their range of colors, sizes, and textures makes them useful in nearly every type of meal. Add them to breakfast hashes, fresh salads, grain bowls, spreads, skillet dinners, and baked dishes.

    Start by cooking one variety and using it in several ways throughout the week. Once you learn which beans stay firm and which become creamy, it becomes easier to plan meals around them. With a little preparation, heirloom beans can bring variety, convenience, and satisfying flavor to your everyday cooking.

  • Why Creative Pickling Is Becoming a Favorite Kitchen Hobby

    Why Creative Pickling Is Becoming a Favorite Kitchen Hobby

    A Simple Hobby With Plenty of Room for Creativity

    Pickling is having a moment in home kitchens, and it is easy to understand why. The basic process is simple, the ingredients are usually affordable, and even beginners can create something flavorful in a short amount of time. A jar of pickled vegetables can add color and brightness to an everyday meal, while the process itself offers an enjoyable way to experiment.

    Creative pickling goes beyond traditional cucumbers. Home cooks are trying onions, carrots, radishes, green beans, cabbage, fruit, herbs, and even combinations of ingredients that reflect their personal tastes. Some prefer sweet and mild flavors, while others enjoy sharp, sour, spicy, or aromatic results.

    This flexibility makes pickling more than a food preparation method. It can become a small, satisfying kitchen hobby that encourages curiosity and hands-on learning.

    Pickling Is Accessible to Beginners

    Many kitchen hobbies require specialized equipment or a long list of ingredients. Pickling often does not. For quick refrigerator pickles, the basic supplies may include:

    – Fresh vegetables or fruit

    – Vinegar

    – Water

    – Salt

    – Sugar, if desired

    – A clean glass jar or container

    – Optional herbs and spices

    A simple brine can be heated on the stove or mixed according to a reliable recipe, then poured over prepared ingredients. After the jar cools, it is stored in the refrigerator so the flavors can develop.

    This approachable process allows beginners to see results quickly. Unlike some cooking projects that require precise timing or advanced techniques, refrigerator pickling can often be completed in less than an hour. The waiting period is usually the hardest part.

    A Creative Way to Explore Flavor

    One of the main attractions of pickling is the opportunity to adjust flavors. A basic brine can become completely different with a few small changes.

    Sweet and Mild

    Adding a modest amount of sugar can soften the sharpness of vinegar. This style works well with carrots, cucumbers, onions, and cabbage. It can be used as a topping for sandwiches, grain bowls, or simple salads.

    Fresh and Herbal

    Fresh dill, parsley, cilantro, thyme, or rosemary can bring a garden-inspired flavor to a jar. Garlic, ginger, or citrus peel can also add depth without making the recipe complicated.

    Spicy and Bold

    Peppercorns, red pepper flakes, jalapenos, or other fresh peppers can give pickles extra energy. The amount can be adjusted to suit individual preferences, making it easy to create a mild or intense result.

    Fragrant and Warm

    Spices such as mustard seeds, coriander seeds, fennel seeds, or cinnamon can create a more layered flavor. These combinations are especially interesting when paired with fruit, onions, or winter vegetables.

    Because the ingredients are easy to change, each batch becomes a small experiment. Keeping notes about the brine, vegetables, and spices can help home cooks repeat successful combinations.

    Pickling Helps Make the Most of Seasonal Produce

    Creative pickling is also appealing because it gives seasonal ingredients a new purpose. When a garden produces more cucumbers, peppers, or beans than a household can use right away, pickling offers one way to enjoy them later.

    The same idea applies to farmers market finds. A large bunch of radishes, an extra head of cabbage, or a surplus of fresh herbs can inspire a new recipe rather than going unused.

    Pickling can also make familiar ingredients feel new. A carrot may be a standard side dish when roasted, but it takes on a fresh personality when sliced into ribbons and paired with vinegar, ginger, and herbs. This change in texture and flavor can make everyday cooking feel more interesting.

    The Process Encourages Mindful Cooking

    There is something satisfying about preparing a jar by hand. Washing the produce, slicing it carefully, measuring the brine, and arranging the ingredients creates a calm, focused routine.

    Pickling also rewards patience. The vegetables may taste good shortly after preparation, but their flavors often become more balanced after several hours or days in the refrigerator. This gradual change gives cooks a chance to notice how ingredients develop over time.

    For many people, the hobby offers a break from rushed meal preparation. A small batch can be made while listening to music, organizing the kitchen, or preparing other ingredients for the week.

    Pickles Add Variety to Everyday Meals

    A jar of homemade pickles can improve a wide range of dishes. Their bright flavor and crisp texture can balance richer or milder foods.

    Try adding pickled ingredients to:

    – Sandwiches and wraps

    – Burgers and tacos

    – Rice and grain bowls

    – Salads

    – Egg dishes

    – Noodle bowls

    – Cheese boards

    – Roasted vegetables

    – Grilled foods

    – Simple soups

    Pickled onions are especially popular because they are quick to prepare and work well with many meals. Pickled carrots and cucumbers can add crunch, while pickled cabbage can bring color and acidity to a bowl or plate.

    Even a small amount can make a dish feel more complete. This makes pickling useful for home cooks who want to add variety without preparing a complicated sauce or side dish.

    A Hobby That Fits Different Cooking Styles

    Pickling can be as casual or structured as the cook prefers. Someone new to the hobby might begin with a single jar of sliced cucumbers. Another person may enjoy developing flavor themes, labeling jars, or creating a collection of seasonal recipes.

    Some home cooks focus on appearance by layering colorful vegetables in clear jars. Others are more interested in texture, trying different cuts such as thin slices, sticks, wedges, or small florets.

    There is also room to explore regional and cultural traditions through cookbooks, family recipes, and cooking classes. Learning how different cuisines use acidity, salt, spices, and fermentation can provide inspiration while encouraging thoughtful experimentation.

    Basic Safety Matters

    Pickling is enjoyable, but safe preparation is important. For refrigerator pickles, use clean containers, fresh produce, and a dependable recipe. Keep the finished pickles refrigerated and follow the recipe’s storage guidance.

    Refrigerator pickles are different from shelf-stable canned pickles. If a recipe is intended for pantry storage, use a tested canning recipe and follow its instructions carefully. Do not assume that changing the amount of vinegar, water, salt, or produce will produce the same result.

    It is also helpful to label each jar with the preparation date and ingredients. Discard pickles if they develop an unusual smell, color, texture, or appearance.

    Why the Hobby Continues to Grow

    Creative pickling brings together several qualities that appeal to modern home cooks: it is affordable, customizable, practical, and rewarding. It can reduce food waste, make meals more interesting, and turn ordinary produce into something memorable.

    Most importantly, pickling does not demand perfection. A beginner can start with a trusted recipe, learn how flavors work, and gradually develop personal favorites. Each batch offers a chance to adjust the balance of sourness, sweetness, salt, spice, and texture.

    Whether it is a single jar of quick-pickled onions or a growing collection of seasonal creations, pickling provides a simple way to make the kitchen feel more creative. With a few fresh ingredients and a little patience, an everyday meal can gain a bright new flavor.

  • A Beginner’s Guide to Hosting a Regional Recipe Exchange

    A Beginner’s Guide to Hosting a Regional Recipe Exchange

    A regional recipe exchange is a simple, enjoyable way to bring people together through food. Guests can share recipes connected to their hometown, family traditions, or favorite local ingredients. The event can be as casual as a neighborhood gathering or as organized as a community workshop.

    You do not need to be an expert cook or host a large dinner. With a clear plan, a comfortable space, and a few helpful guidelines, anyone can organize a successful recipe exchange.

    What Is a Regional Recipe Exchange?

    A recipe exchange is a gathering where participants bring recipes to share with one another. Some hosts also invite guests to bring prepared samples, while others focus on printed or digital recipes and conversation.

    The “regional” part can be interpreted in many ways. Recipes might come from:

    – Different towns or neighborhoods

    – Family backgrounds and traditions

    – Local farms and seasonal ingredients

    – A specific state, province, or region

    – Places where guests have lived or traveled

    – Distinct local cooking styles

    The goal is not to create a competition. It is to encourage people to share stories, discover new dishes, and learn more about the food traditions around them.

    Choose a Simple Theme

    A theme gives the event direction and makes it easier for guests to decide what to bring. Choose something broad enough to include different cooking styles and experience levels.

    Here are a few ideas:

    – Favorite dishes from your hometown

    – Recipes using local ingredients

    – Regional comfort foods

    – Family breakfasts

    – Seasonal recipes

    – Homemade snacks and desserts

    – Soups, stews, and one-pot meals

    – Recipes passed down through generations

    You can also choose a theme based on the format. For example, a “recipe card exchange” may focus on written recipes, while a “taste and share” event can include small samples.

    Keep the theme flexible. Guests should feel welcome even if their recipe does not fit perfectly into one category.

    Decide on the Format

    Before sending invitations, decide how the exchange will work. A few common formats are easy for beginners to manage.

    Recipe Cards Only

    Each guest brings several copies of one recipe. Participants place the cards on a table and take home the recipes that interest them.

    This format is affordable, simple, and suitable for small spaces. It also works well when guests have limited time or do not want to prepare food.

    Tasting Table

    Guests bring a prepared dish along with a printed recipe. Everyone samples small portions and talks about the ingredients, preparation methods, and regional connections.

    This format creates a lively atmosphere, but it requires more planning. You will need serving utensils, labels, plates, napkins, and enough table space.

    Demonstration and Discussion

    One or two guests demonstrate a recipe or cooking technique. The rest of the group can ask questions and share related ideas.

    This option works well for a library, community center, cooking club, or small private gathering. Keep demonstrations short so everyone has a chance to participate.

    Combination Event

    You can combine these formats by offering a tasting table, a recipe display, and a short discussion. This gives guests several ways to participate.

    Set a Date, Location, and Guest List

    Select a date that gives people enough time to prepare. Weekends are often convenient, but an evening during the week may work well for a smaller group.

    Possible locations include:

    – A home dining room

    – A shared community room

    – A library meeting space

    – A school or organization kitchen

    – A local park with suitable facilities

    – A workplace break room

    Check the location’s rules before planning the food portion of the event. Some spaces may have restrictions on cooking, heating appliances, or serving food.

    For a first exchange, invite between eight and fifteen people. This is large enough to create variety but small enough to manage comfortably. You can ask each guest to bring one recipe and a few copies to share.

    Send Clear Invitations

    Your invitation should answer the most important questions:

    – What is the event?

    – When and where will it take place?

    – What is the theme?

    – Should guests bring food, recipe cards, or both?

    – How many people should each dish serve?

    – When should guests respond?

    – Should guests mention dietary details?

    A short message might say:

    “Join us for a regional recipe exchange on Saturday, April 20, from 2 to 4 p.m. Bring one favorite recipe connected to a place, family tradition, or local ingredient. You may also bring a small sample to share. Please bring five printed copies of your recipe and note any common allergens.”

    Invite guests through email, a community bulletin board, a group message, or a simple online event page.

    Create a Recipe Submission Plan

    A little organization helps prevent repeated recipes and missing information. Ask guests to send you the recipe title before the event. You can keep a simple list of submissions and share it with the group.

    Encourage each recipe to include:

    – Recipe name

    – Regional connection

    – Ingredient list

    – Preparation steps

    – Cooking or chilling time

    – Number of servings

    – Helpful substitutions

    – A short story or personal note

    A personal story can make a recipe more memorable. For example, a guest might explain when the dish is usually served, who taught them to make it, or why a certain local ingredient matters.

    Plan the Food and Setup

    If guests bring prepared samples, ask for small portions rather than full dishes. Bite-sized servings allow everyone to try more recipes and reduce waste.

    Prepare the following supplies:

    – Small plates or bowls

    – Forks, spoons, and napkins

    – Serving utensils

    – Recipe labels

    – Pens and blank cards

    – Water and simple drinks

    – Trash and recycling containers

    – Table coverings

    – Containers for leftovers

    Label each dish with its name and the person who brought it. Include a clear note about common ingredients when possible. Guests can then make informed choices based on their preferences and needs.

    Keep hot and cold foods at appropriate temperatures, and avoid leaving perishable dishes out for long periods. If you are unsure about handling a particular dish, ask the person who prepared it for serving instructions.

    Add Conversation Starters

    Good conversation helps guests connect beyond the food. Place a few questions around the room or include them on the table.

    Try these prompts:

    – Where did this recipe come from?

    – What makes this dish regional?

    – Is the recipe served during a particular season?

    – What ingredient gives it its signature flavor?

    – How has the recipe changed over time?

    – What is your favorite way to serve it?

    – What local ingredient could be used in a new version?

    You can also provide a large map where guests mark the places connected to their recipes. This creates a visual display and gives everyone an easy way to start a conversation.

    Organize the Event Schedule

    A simple schedule keeps the gathering moving without making it feel formal.

    Welcome and Introductions

    Spend the first few minutes greeting guests and explaining the format. Invite everyone to briefly introduce their recipe.

    Recipe Display

    Give guests time to place their recipe cards, labels, and samples on the tables. This is a good opportunity to take photos of the display, with permission.

    Tasting and Conversation

    Allow guests to move around, sample food, and discuss the recipes. You can guide the conversation with the prepared questions.

    Recipe Collection

    Near the end, remind guests to collect recipe cards and note any recipes they want to try. Offer folders or envelopes to keep everything organized.

    Closing

    Thank everyone for participating and ask whether they would enjoy another exchange. You can also create a shared digital folder for recipes after the event.

    Make the Exchange Welcoming

    A successful event should be comfortable for people with different cooking backgrounds. Emphasize that homemade, adapted, and beginner-friendly recipes are all welcome.

    Avoid judging recipes or comparing cooking skills. Some guests may bring a treasured family dish, while others may share a simple meal they recently discovered. Both contributions add value.

    Consider offering a nonfood role for guests who cannot prepare a dish. They might help with setup, photography, recipe organization, or welcoming attendees.

    Follow Up Afterward

    Within a few days, send a thank-you message to the group. Share a recipe list, photos, or highlights from the event. You can also ask guests for feedback using two or three simple questions:

    – What did you enjoy most?

    – What could be improved?

    – What theme would you like next time?

    Save the recipes in a shared document or small digital booklet. With permission from the contributors, you can distribute it to everyone who attended.

    A regional recipe exchange does more than collect cooking instructions. It creates a space for people to share memories, discover local traditions, and enjoy one another’s company. Start with a manageable group, keep the guidelines clear, and focus on conversation. Even a small gathering can become a meaningful community tradition.

  • Local Artisan Bread Trends Inspiring Home Bakers in 2026

    Local Artisan Bread Trends Inspiring Home Bakers in 2026

    Local bakeries continue to inspire home cooks in 2026, bringing fresh ideas to everyday bread baking. While classic sourdough remains popular, today’s artisan bread scene is also embracing regional grains, simple ingredients, creative shapes, and practical methods that fit busy schedules.

    These trends are not about making bread overly complicated. Instead, they encourage bakers to pay closer attention to flavor, texture, local ingredients, and the pleasure of sharing a homemade loaf. Here are some of the ideas making their way from neighborhood bakeries into home kitchens.

    1. Heritage and Regional Grains

    One of the biggest trends is the return of older grain varieties and locally grown wheat. Many small bakeries are working with heritage grains because they offer distinctive flavors and help connect bread to a particular region.

    Heritage grains can have notes of nuttiness, sweetness, or earthiness. They may also produce loaves with a denser texture than bread made entirely with modern white flour. For home bakers, they offer an easy way to make familiar recipes more interesting.

    Try using:

    – Whole wheat flour from a local mill

    – Rye flour for a deeper, earthy flavor

    – Spelt flour for a gently sweet taste

    – Einkorn or other heritage wheat varieties

    – Cornmeal, oat flour, or buckwheat in small amounts

    When substituting a different flour, start by replacing only 10 to 25 percent of the flour in a recipe. Different grains absorb water in different ways, so small adjustments can help you learn how the dough behaves.

    2. Naturally Fermented Bread

    Sourdough is still a favorite, but local bakers are exploring more than the traditional round loaf. Naturally fermented dough is appearing in sandwich bread, dinner rolls, pizza crusts, flatbreads, and even sweet breakfast buns.

    The appeal is partly about flavor. A long fermentation can give bread a pleasantly complex taste and a chewy texture. It also allows bakers to work with a slower, more flexible schedule.

    For beginners, the best approach is to keep the process simple:

    1. Start with a reliable sourdough starter.
    2. Use a recipe with clear measurements.
    3. Give the dough enough time to rise.
    4. Watch the dough’s appearance rather than relying only on the clock.
    5. Keep notes so you can improve the next loaf.

    A starter does not need to be treated as a difficult project. Once it becomes active and predictable, regular feeding can become part of a weekly baking routine.

    3. Smaller Loaves for Modern Kitchens

    Many artisan bakeries are offering smaller loaves, and home bakers are following their lead. Mini boules, personal baguettes, and small sandwich loaves are useful for households that do not want a large loaf going stale before it can be eaten.

    Smaller breads are also a good way to test new recipes. You can experiment with a new flour, topping, or shaping technique without using a large amount of ingredients.

    Small loaves work well for:

    – Weeknight dinners

    – Gift baskets

    – Brunch tables

    – Lunch sandwiches

    – Single or two-person households

    If you reduce a recipe, pay attention to baking time. Smaller loaves usually finish sooner, so begin checking them earlier than the original instructions suggest.

    4. Creative Shapes and Rustic Finishes

    Artisan bread is becoming more visual, with local bakers using simple shaping techniques to create attractive loaves. Decorative scoring, braided dough, coils, knots, and rolls arranged in rings can make homemade bread feel special without requiring professional equipment.

    Scoring allows the dough to expand in a controlled way during baking. A sharp knife or bread lame can create basic lines, leaves, crosses, or wheat patterns. Beginners can start with one clean slash across the top of a loaf before trying more detailed designs.

    Other easy presentation ideas include:

    – Sprinkling the dough with sesame or sunflower seeds

    – Brushing rolls with milk or beaten egg

    – Adding herbs to the dough

    – Shaping dinner rolls into small knots

    – Baking small loaves in a round arrangement

    The goal is not perfection. A rustic appearance is part of the charm of artisan bread.

    5. Savory Flavors Inspired by Local Ingredients

    Local bakeries are adding regional ingredients to bread, giving familiar recipes a stronger sense of place. Home bakers can use the same idea with ingredients from farmers markets, gardens, or neighborhood food shops.

    Popular additions include roasted garlic, fresh herbs, caramelized onions, grated cheese, olives, dried fruit, and toasted nuts. Seasonal vegetables can also add flavor and color when prepared properly.

    For a balanced loaf, keep mix-ins modest. Too many wet or heavy ingredients can make dough difficult to shape. Cool cooked ingredients before adding them, and fold them in after the dough has developed some strength.

    Try combinations such as:

    – Rosemary and roasted garlic

    – Cheddar and green onion

    – Cranberry and walnut

    – Olive and lemon zest

    – Apple and cinnamon

    – Sun-dried tomato and basil

    These flavors can turn a simple loaf into the centerpiece of a meal.

    6. Better Use of Leftover Bread

    Waste-conscious baking is another strong trend. Local bakeries are finding creative ways to use extra bread, and home bakers can do the same with slices that are no longer fresh enough for sandwiches.

    Stale bread can become:

    – Toasted breadcrumbs

    – Croutons

    – French toast

    – Bread pudding

    – Stuffing

    – Soup thickener

    – Crisp snack slices

    You can also freeze sliced bread before it becomes stale. Place the slices in a tightly sealed container or bag, then toast them directly from frozen when needed.

    Using every part of a loaf makes baking more practical and encourages home cooks to see bread as a flexible ingredient rather than a product with only one purpose.

    7. Bread Baking With Flexible Schedules

    Local artisan bakers are also inspiring people to choose recipes that fit their routines. No-knead doughs, overnight fermentation, and refrigerator rises make it possible to bake fresh bread without spending hours in the kitchen at one time.

    An overnight method can be especially convenient. Mix the dough in the evening, let it rise slowly, shape it the next day, and bake it when you are ready.

    For a more flexible routine:

    – Prepare dough after dinner

    – Use the refrigerator to slow fermentation

    – Shape rolls in advance

    – Freeze unbaked dough when appropriate

    – Bake smaller batches throughout the week

    The most useful recipe is one you can repeat. A simple loaf made regularly often brings more satisfaction than an elaborate recipe that is difficult to fit into your schedule.

    8. Building a Local Bread Routine at Home

    You do not need specialty equipment to follow these trends. A mixing bowl, kitchen scale, baking sheet, and oven-safe pot are enough for many recipes. A clean work surface and a little patience matter more than a large collection of tools.

    Begin with one dependable recipe and change only one detail at a time. You might try a different flour, add a new flavor, or shape the loaf in another way. This makes it easier to understand what affects the final result.

    Local artisan bread trends are ultimately about connection: to ingredients, to community, and to the process of making food by hand. Whether you are caring for a sourdough starter, visiting a nearby mill, or baking a small loaf for dinner, these ideas offer plenty of ways to make bread more personal and enjoyable in 2026.

  • Balcony Herb Gardens: Creative Cooking Projects for Women 65+

    Balcony Herb Gardens: Creative Cooking Projects for Women 65+

    A balcony does not need to be large to become a productive garden. With a few containers, good light, and regular care, women 65 and older are turning small herb gardens into creative cooking projects. Fresh basil, mint, parsley, thyme, rosemary, and chives can add new ideas to everyday meals without requiring a large yard.

    For many gardeners, the joy comes from more than growing plants. It also comes from planning recipes, preserving a harvest, sharing food, and finding new uses for familiar ingredients. A balcony herb garden can become a relaxing hobby and a source of inspiration in the kitchen.

    Start With a Balcony-Friendly Herb Garden

    The best herb garden is one that fits comfortably into your space and routine. Before buying plants, notice how much sunlight reaches the balcony during the day. Many herbs grow well with several hours of light, while some can manage with less.

    Choose containers that are easy to reach and move. Window boxes, railing planters, lightweight pots, and vertical shelves can help use space efficiently. Make sure containers have drainage holes and are placed securely.

    Good starter herbs include:

    – Basil for pasta, sandwiches, and sauces

    – Chives for eggs, potatoes, and soups

    – Parsley for salads, grains, and garnishes

    – Mint for drinks, fruit dishes, and desserts

    – Thyme for roasted vegetables and beans

    – Rosemary for breads, potatoes, and savory dishes

    – Oregano for tomato-based meals and marinades

    Starting with three or four herbs can make the garden easier to manage. As confidence grows, gardeners can add more plants or try unusual varieties, such as lemon thyme or purple basil.

    Turn Gardening Into a Cooking Plan

    A creative herb project can begin before the first leaf is picked. Consider choosing a weekly cooking theme based on the herbs that are growing best.

    For example, a strong basil harvest could inspire an Italian-style week. Parsley and mint might lead to fresh grain salads, while rosemary and thyme could become the focus of a simple roasted vegetable dinner.

    A small garden notebook can help track:

    – When each herb was planted

    – How often it needs water

    – Which recipes use the most leaves

    – Favorite combinations of herbs

    – Ideas for future meals

    This notebook can include handwritten recipes, pressed leaves, planting notes, or photographs. It can become a personal garden cookbook over time.

    Planning meals around the garden also helps prevent herbs from being forgotten in the refrigerator. Picking only what is needed keeps meals fresh and encourages regular harvesting.

    Create Simple Herb-Based Recipes

    Fresh herbs can make familiar foods feel new. They do not always need to be the main ingredient. Often, a small amount can change the flavor and appearance of a simple dish.

    Herb Butter

    Soften a stick of butter and mix in finely chopped chives, parsley, rosemary, or thyme. Add a little lemon zest if desired. Spoon the mixture onto wax paper, shape it into a log, and chill it.

    Herb butter can be used on:

    – Toasted bread

    – Corn

    – Steamed vegetables

    – Baked potatoes

    – Grilled fish or chicken

    It also makes a thoughtful homemade gift when wrapped neatly and labeled with the ingredients.

    Fresh Herb Salad Dressing

    Combine olive oil, vinegar or lemon juice, chopped parsley, chives, or mint, and a small amount of mustard. Shake the mixture in a jar and taste it before serving.

    This dressing works well with green salads, beans, cooked vegetables, and grain bowls. Making a small jar each week is an easy way to use herbs regularly.

    Garden Toasts

    Toast slices of bread and top them with ingredients already on hand. Try soft cheese with basil, tomatoes with oregano, or mashed avocado with chives and lemon.

    Garden toasts can be served as a light lunch, a snack, or a colorful appetizer for visitors. They are also easy to change according to the season.

    Herb-Infused Water and Tea

    Mint, basil, lemon thyme, and rosemary can add flavor to water. Place a few clean leaves in a pitcher, add water, and chill it for several hours.

    For a simple herbal drink, use fresh mint or lemon balm with hot water. Allow it to steep, then enjoy it warm or over ice. When trying a new plant, confirm that it is suitable for food and use only herbs grown without unsafe chemicals.

    Explore Small-Batch Preserving

    When a balcony garden produces more herbs than can be used immediately, small-batch preserving can extend the harvest. Drying is one of the simplest methods.

    To dry herbs, gently rinse them if needed and pat them dry. Tie small bunches and hang them in a clean, dry place with good air circulation. Once the leaves are crisp, remove them from the stems and store them in labeled containers.

    Another option is to freeze chopped herbs. Place them in ice cube trays with water or oil, then transfer the frozen cubes to a labeled freezer container. These cubes can be added to soups, sauces, and cooked vegetables.

    Labels should include the herb name and date. This makes the freezer or pantry easier to organize and helps ensure older batches are used first.

    Make Cooking a Social Project

    A balcony herb garden can bring people together. Some women invite friends or family members to help with planting, harvesting, or recipe testing. Others share small bundles of herbs with neighbors.

    A casual “herb exchange” can be a fun way to compare ideas. Each participant might bring:

    – A small bunch of fresh herbs

    – A favorite recipe

    – A homemade seasoning blend

    – A container of herb butter

    – A story about a successful or surprising dish

    Cooking clubs can also choose one herb each month and explore several ways to use it. Basil might become pesto, salad dressing, soup topping, and sandwich spread. Mint could be used in fruit salad, tea, yogurt sauce, and desserts.

    These projects make the garden feel connected to everyday life rather than separate from it.

    Keep the Project Comfortable and Enjoyable

    Gardening should fit the gardener’s schedule, space, and energy. Use lightweight containers when possible, and place frequently used herbs where they are easy to reach. A small watering can may be more convenient than a large one.

    Regular trimming encourages many herbs to produce new growth. Harvest in small amounts instead of waiting for a large crop. If a plant becomes difficult to manage, it is perfectly reasonable to replace it with something easier.

    The most successful balcony gardens are not always the largest. They are the ones that provide pleasure, useful ingredients, and a reason to try something new.

    Find Inspiration in Every Harvest

    For women 65 and older, balcony herb gardening can be both a creative outlet and a practical cooking project. Each harvest offers a chance to experiment with color, flavor, and presentation.

    A few pots can inspire a new recipe, a shared meal, a personal cookbook, or a thoughtful gift. Whether the project involves a single pot of chives or a full collection of seasonal herbs, the goal is simple: grow something useful, enjoy the process, and let the garden bring fresh ideas to the table.

  • The Growing Appeal of Botanical Mocktails for Afternoon Gatherings

    The Growing Appeal of Botanical Mocktails for Afternoon Gatherings

    Afternoon gatherings have a special kind of charm. They are relaxed enough for casual conversation yet polished enough to feel like an occasion. Whether you are hosting a garden party, book club, brunch, or weekend visit with friends, the drinks you serve can help set the mood.

    Botanical mocktails are becoming a popular choice for these events. Made with ingredients such as herbs, flowers, fruit, spices, tea, and sparkling water, they offer layers of flavor without relying on alcohol. Their bright colors and thoughtful garnishes also make them feel festive and special.

    What Makes Botanical Mocktails So Appealing?

    A botanical mocktail is a nonalcoholic drink that highlights plant-based flavors. Common ingredients include mint, basil, rosemary, lavender, cucumber, citrus, berries, ginger, and floral syrups. These elements can be combined with sparkling water, iced tea, tonic-style mixers, or fresh juice.

    The appeal comes from several qualities:

    – Fresh, layered flavors: Herbs and flowers add complexity to familiar fruit and citrus flavors.

    – A polished presentation: Clear glasses, colorful garnishes, and bubbles create visual appeal.

    – Inclusive entertaining: Guests can enjoy a thoughtfully made drink whether or not they drink alcohol.

    – Seasonal flexibility: Ingredients can be adapted for spring, summer, fall, or winter gatherings.

    – Easy customization: Each drink can be adjusted to suit different taste preferences.

    Unlike a simple glass of juice or soda, a botanical mocktail feels intentionally crafted. It gives guests something to notice, discuss, and enjoy throughout the gathering.

    A Natural Fit for Afternoon Gatherings

    Afternoon events often call for drinks that are refreshing but not too heavy. Botanical mocktails fit this setting well because they can be light, crisp, and aromatic. They pair naturally with foods commonly served during the day, including tea sandwiches, fresh fruit, salads, pastries, and small desserts.

    Their appearance also suits daytime entertaining. Soft floral tones, green herbs, citrus slices, and sparkling bubbles can complement a table decorated with fresh flowers, linen napkins, or simple glassware.

    For a casual gathering, you can serve mocktails in tumblers with plenty of ice. For a more formal event, try stemmed glasses, coupe glasses, or vintage-inspired drinkware. The same recipe can take on a different character depending on how it is presented.

    Building a Botanical Mocktail

    A balanced mocktail usually includes a few basic components. Understanding their roles makes it easier to create drinks without following a strict recipe.

    1. Choose a flavor base

    Start with a main flavor. This might be:

    – Fresh berries

    – Citrus juice

    – Cucumber

    – Apple or pear juice

    – Iced green or black tea

    – Coconut water

    – Pomegranate juice

    The base provides the main character of the drink. For afternoon gatherings, lighter flavors such as lemon, cucumber, pear, and berries work especially well.

    2. Add a botanical element

    Next, introduce an herb, flower, or spice. A small amount is often enough to make the drink more interesting.

    Popular combinations include:

    – Strawberry and basil

    – Lemon and thyme

    – Cucumber and mint

    – Peach and rosemary

    – Blueberry and lavender

    – Pear and ginger

    – Orange and cardamom

    Fresh herbs can be gently pressed or added as a garnish. Floral syrups and spice-infused simple syrups can bring a more noticeable flavor.

    3. Balance the sweetness

    Sweetness helps round out tart fruit and citrus, but too much can make a drink feel heavy. Simple syrup, honey syrup, fruit preserves, or a small amount of flavored cordial can be used to adjust the taste.

    When serving a group, keep the drink moderately sweet and offer extra syrup on the side. This allows guests to customize their glasses.

    4. Add brightness

    Citrus juice is one of the easiest ways to bring a drink into balance. Lemon, lime, grapefruit, and orange each provide a different style of freshness.

    A small splash can make a sweet drink taste livelier. Citrus zest can also be used in syrups or as a garnish for added aroma.

    5. Finish with bubbles

    Sparkling water, club soda, ginger beer, or a nonalcoholic sparkling mixer can add a lively finish. Add bubbly ingredients shortly before serving to preserve the carbonation.

    Pouring the sparkling component over ice at the table can also create an appealing presentation.

    Three Easy Botanical Mocktail Ideas

    Cucumber Mint Sparkler

    Muddle a few cucumber slices and mint leaves in a glass. Add lime juice, a small amount of simple syrup, and ice. Top with sparkling water, then garnish with a cucumber ribbon and a mint sprig.

    This drink is crisp, light, and easy to prepare in individual glasses.

    Berry Basil Fizz

    Combine muddled berries, lemon juice, and basil syrup in a glass or pitcher. Add ice and sparkling water, then stir gently. Garnish with a fresh berry and a small basil leaf.

    For a gathering, prepare the berry mixture in advance and add the sparkling water just before guests arrive.

    Peach Rosemary Iced Tea

    Steep black or herbal tea and let it cool. Add peach nectar, lemon juice, and a rosemary-infused syrup. Serve over ice and finish with a rosemary sprig.

    This mocktail can be served in a pitcher, making it a practical choice for a larger afternoon event.

    Presentation Tips That Make a Difference

    A few simple details can make homemade drinks look professionally prepared.

    – Use clear glassware to show off the drink’s color.

    – Choose garnishes that reflect the ingredients.

    – Add edible flowers only when they are clearly labeled as food-safe.

    – Freeze berries, citrus slices, or herbs into ice cubes.

    – Place a small garnish on each glass rather than overloading the drink.

    – Use a glass pitcher for batch drinks and a separate carafe for sparkling water.

    – Keep chilled ingredients ready so the drinks can be assembled quickly.

    Garnishes should support the flavor rather than simply decorate the glass. A sprig of rosemary works well with peach or apple, while mint complements cucumber, lime, and berries.

    How to Serve Mocktails to a Crowd

    For a larger gathering, preparation is the key to a relaxed experience. Make syrups, tea bases, and fruit mixtures several hours ahead of time. Chill all ingredients before guests arrive.

    Avoid combining sparkling water too early, since the bubbles will fade. Instead, place the base mixture in a pitcher and add the carbonated ingredient shortly before serving. You can also create a self-serve mocktail station with labeled ingredients, ice, garnishes, and attractive glasses.

    A simple setup might include:

    – One or two prepared drink bases

    – Sparkling water and another mixer

    – Fresh citrus wedges

    – Herb sprigs

    – Ice

    – Small cards listing the ingredients

    Offering two different flavor profiles gives guests a choice without making the menu complicated. For example, serve one crisp cucumber drink and one fruit-forward berry option.

    Making Botanical Mocktails Part of the Experience

    The growing popularity of botanical mocktails reflects a wider interest in thoughtful, flavorful refreshments. Guests often appreciate drinks that feel special without being difficult to understand or prepare.

    These beverages can become part of the gathering’s theme. A spring event might feature edible flowers, mint, and strawberries. A late-summer table could highlight peaches, basil, and sparkling water. For an autumn afternoon, try apple, ginger, cinnamon, or rosemary.

    Most importantly, botanical mocktails invite creativity. With a few fresh ingredients and a balanced approach, you can create drinks that look beautiful, pair well with food, and give every guest something refreshing to enjoy.

  • Preserving Family Food Traditions Through Handwritten Recipes

    Preserving Family Food Traditions Through Handwritten Recipes

    Family recipes are more than lists of ingredients and instructions. They often carry memories of shared holidays, weekend breakfasts, garden harvests, and everyday meals made with care. A handwritten recipe project offers a simple, meaningful way to preserve those traditions and pass them on to future generations.

    Unlike a digital file, a handwritten collection can capture personal details that are easy to lose. The shape of a relative’s handwriting, a note in the margin, or a small stain from years of use can all become part of the family story. With a little planning, you can create a recipe project that is both useful in the kitchen and valuable as a keepsake.

    Why Handwritten Recipes Matter

    A handwritten recipe often reflects the person who created or shared it. The wording may be informal, with instructions such as “add enough flour” or “bake until golden.” These phrases may require interpretation, but they also reveal the cook’s habits and personality.

    Recipe cards can preserve details such as:

    – Family nicknames for favorite dishes

    – Special occasions when a recipe was served

    – Ingredient substitutions

    – Cooking tips learned through experience

    – Notes about who taught the recipe

    – Memories connected to the meal

    A handwritten recipe project also creates an opportunity for family members to work together. One person might gather recipes, another might scan old cards, and someone else might record the stories behind them. The finished collection becomes a shared project rather than just a book.

    Start by Gathering Recipes

    Begin with the recipes already available in your home. Look through kitchen drawers, old notebooks, recipe boxes, photo albums, and folders. Ask relatives to check their own collections, too. Some of the most meaningful recipes may be written on envelopes, index cards, scraps of paper, or the backs of grocery lists.

    Create a simple inventory as you gather materials. You might record:

    – Recipe name

    – Name of the person who wrote or shared it

    – Approximate date, if known

    – Current owner of the original

    – Whether the recipe has been tested

    – Any related photographs or stories

    Do not worry if some recipes are incomplete. Missing quantities and unclear instructions are common in older family collections. Instead, mark these recipes for later discussion or testing.

    Interview the People Behind the Recipes

    The story behind a recipe can be just as important as the recipe itself. Talk with relatives, family friends, or longtime community members who may remember how a dish was prepared and served.

    Prepare a few open-ended questions, such as:

    – Who usually made this recipe?

    – When was it served?

    – Was it connected to a holiday or celebration?

    – Where did the recipe come from?

    – Did the cook change any ingredients?

    – What should a new cook know before making it?

    – What memories come to mind when you think of this dish?

    You can write down the answers, record an audio conversation with permission, or ask the person to add their own notes. Keep the tone relaxed. Casual conversations often reveal small details that make the collection feel personal and vivid.

    Choose a Format for the Project

    There are several ways to organize a handwritten recipe project. The right choice depends on your goals, materials, and available time.

    A Handwritten Recipe Book

    A blank journal or binder can become a central family cookbook. A binder is especially useful because pages can be added or rearranged. Use protective sleeves for fragile originals while placing readable copies on nearby pages.

    You can divide the book into sections such as:

    – Breakfast and brunch

    – Soups and main dishes

    – Breads and baked goods

    – Desserts

    – Drinks and preserves

    – Holiday favorites

    A Collection of Recipe Cards

    Recipe cards are easy to share with relatives and convenient to use while cooking. You can create one card for each recipe, then store the cards in a decorated box. Include the original handwriting when possible, along with a clearer transcription if the writing is difficult to read.

    A Family Recipe Binder

    A binder can combine handwritten pages, typed transcriptions, photographs, and family stories. Add tabs, page protectors, and pockets for loose notes. This format works well when you expect the collection to grow over time.

    Preserve the Originals Carefully

    Original recipe cards can be delicate, especially if they have been exposed to heat, moisture, or frequent handling. Before placing them in a book or box, make copies or digital scans. This protects the information if the original is damaged or misplaced.

    Helpful preservation habits include:

    – Keep original cards away from spills and cooking surfaces

    – Store paper in a cool, dry location

    – Use archival-quality sleeves when possible

    – Avoid attaching originals with glue or permanent tape

    – Handle fragile pages with clean, dry hands

    – Label scanned files with clear recipe names

    If a recipe has stains, torn edges, or faded writing, do not try to “improve” the original. Those marks are part of its history. Instead, preserve the card as it is and create a readable copy for everyday use.

    Test and Clarify the Recipes

    Some traditional recipes were written for cooks who already knew the method. A card might list ingredients without measurements or assume the reader understands how to prepare a dish. Testing the recipe can help make it useful for newer generations.

    When testing, take notes about:

    – Ingredient amounts

    – Pan sizes

    – Cooking temperatures

    – Preparation and baking times

    – Number of servings

    – Helpful substitutions

    – Steps that need more explanation

    Keep the original wording alongside any updated instructions. Rather than replacing the family member’s recipe, add a “kitchen notes” section. This respects the original while making the recipe easier to follow.

    Add Photos and Personal Details

    Photographs can bring the collection to life. Include images of the person who made the recipe, the kitchen where it was prepared, or a family gathering where the dish was served. You can also photograph the finished food or the original recipe card.

    Consider adding short introductions to important recipes. A few sentences can explain why the dish matters, such as:

    “This cake was made every year for the spring picnic. The recipe came from a neighbor and was copied into this notebook in the 1970s.”

    These notes give future readers context and help them understand that the collection is about more than cooking instructions.

    Invite the Next Generation to Participate

    Children and younger family members can contribute in age-appropriate ways. They might decorate section pages, copy short recipes, interview relatives, or help prepare a dish. Participation gives them a personal connection to the finished project.

    You can also create a tradition of adding one new page each year. Invite family members to contribute a favorite recipe, a recent photo, or a memory from the past year. Over time, the collection will represent both older traditions and newer family experiences.

    Share and Continue the Tradition

    Once the project is complete, make copies for relatives or create a shared digital backup. Keep the original collection in a safe place, but allow family members to use practical copies in their own kitchens.

    Most importantly, cook from the collection. Prepare the recipes during holidays, family gatherings, or ordinary weekends. A recipe tradition stays alive when people continue to use it, adapt it, and talk about it.

    A handwritten recipe project does not need to be perfect or professionally designed. Its value comes from the people, stories, and everyday moments it preserves. By gathering old recipes, recording family memories, and making room for new contributions, you can create a lasting record of the food traditions that bring people together.

tetonyi.pro
Privacy Overview

This website uses cookies so that we can provide you with the best user experience possible. Cookie information is stored in your browser and performs functions such as recognising you when you return to our website and helping our team to understand which sections of the website you find most interesting and useful.